Introduction:
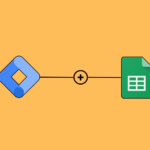
In the fast-paced world of online marketing, it’s important to affectively integrate essential tools. And that’s where ClickFunnels, Zapier, and BigQuery come in. Together, they offer a world of possibilities to make your marketing efforts more effective. Join us on an exciting journey as we explore the amazing potential of integrating ClickFunnels with Zapier and BigQuery to create a data warehouse.
What is a data warehouse?
A data warehouse, in essence, is like a special storage place that effectively collects and organizes different types of information. Moreover, it actively consolidates data from multiple sources, creating a well-organized space. Simply put, it’s a thoughtfully designed system that enables people to analyze and comprehend the data with ease.
To illustrate, imagine it as a large library where you can access and study books on various subjects. With a data warehouse, businesses can make informed decisions and uncover hidden patterns or trends within the data. In essence, it acts as a valuable tool that seamlessly guides users in understanding and utilizing information effectively.
Why connect ClickFunnels with Zapier and BigQuery?
- Keep all your data organized: When you connect ClickFunnels with Zapier and BigQuery, it helps you keep all the information from your sign-up forms in one place. This makes it easier to find, analyze, and use the data for different
things. - Learn more about your customers: By connecting ClickFunnels with BigQuery, you can use a tool called BigQuery to learn interesting things about the people who sign up on your website. You can see patterns and get insights that can help you make better decisions about your marketing.
- Save time with automation: Zapier acts like a helper that connects ClickFunnels with many other tools. When you connect them, you can set up things to happen automatically. For example, you can add new sign-ups to your customer list. You can send personalized emails, or update information without doing it all manually.
- Grow your business easily: Managing data can become hard as your business gets bigger. But when you connect ClickFunnels with Zapier and BigQuery, it’s easier to handle many sign-ups without any trouble.
- You can scale your marketing efforts, analyze data quickly, and make smart decisions that help your business grow.
Now that you understand what a data warehouse is. Why integrating ClickFunnels with Zapier and BigQuery is important, let’s explore the steps involved. In the following sections, we will guide you through a step-by-step process to connect your ClickFunnels to Zapier and utilize the analytical power of BigQuery. By the end of this journey, you’ll have the knowledge and tools to enhance your marketing efforts, streamline data management, and make data-driven decisions. Let’s begin and unlock the full potential of this powerful integration!
Don’t miss out on the opportunity to increase your marketing efforts! Schedule a call with us now and unlock the full potential of our marketing automation
Step 1: Log in to your ClickFunnels Account
Firstly, log in to your ClickFunnels account.
Next, open the funnel from which you want to retrieve data.
If you don’t have a funnel yet, click on “Build A Funnel” in the Quick Links options to create a new one.
Create an opt-in page within your chosen funnel that includes the fields you want to visualize in BigQuery, such as First Name, Last Name, Email, Phone, etc.

Step 2: Set up the Trigger in Zapier for ClickFunnels
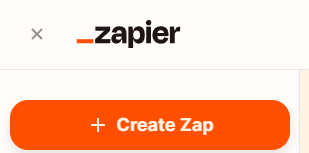
To begin with, log in to your Zapier account.
Then, click on “Create Zap” to start the setup process.
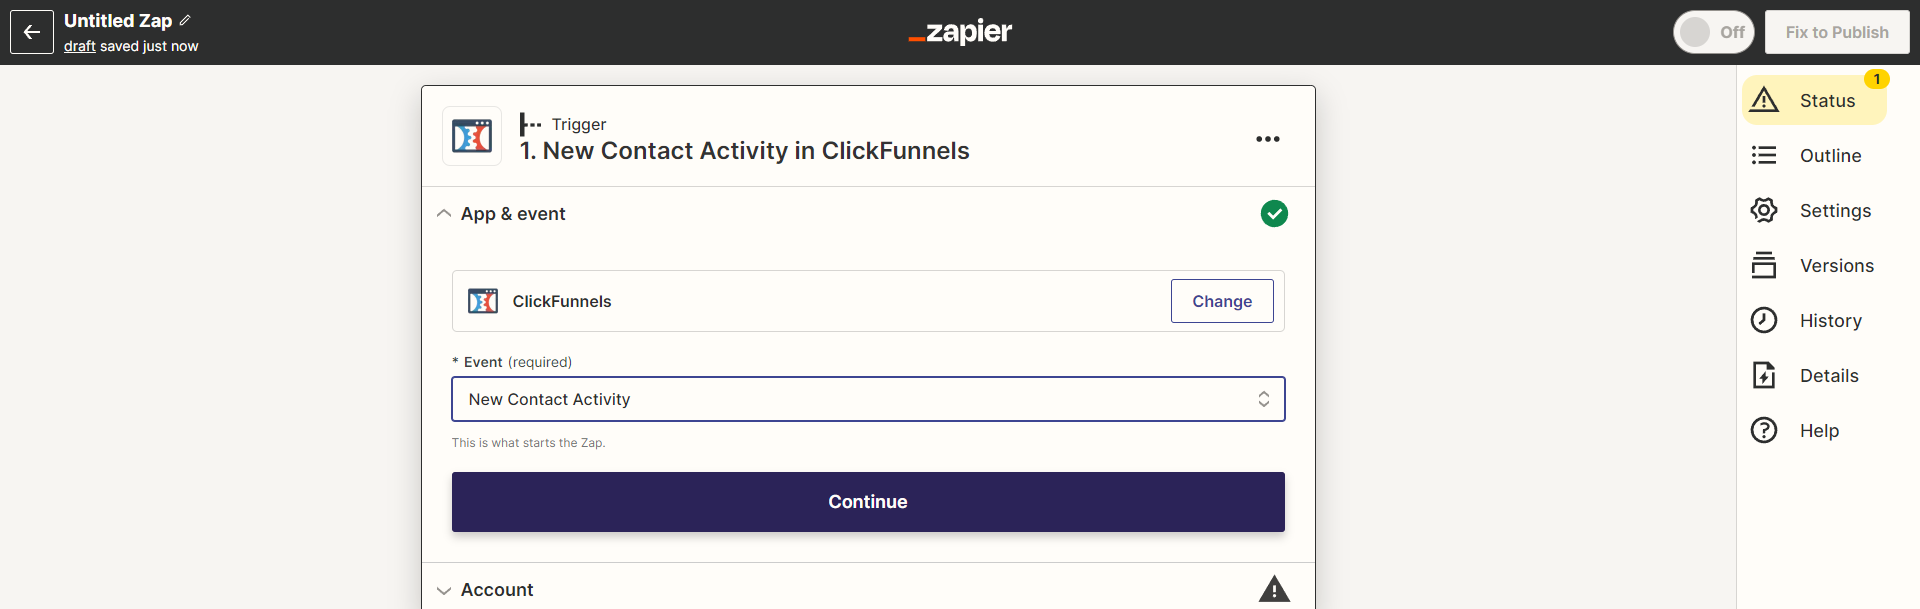
In the trigger search bar, type “ClickFunnels” and select it from the options.
Choose “New Contact Activity” in the event options and click “Continue.”
Next, select the ClickFunnels account you want to use and login if necessary.
Click on “Continue” to proceed further.
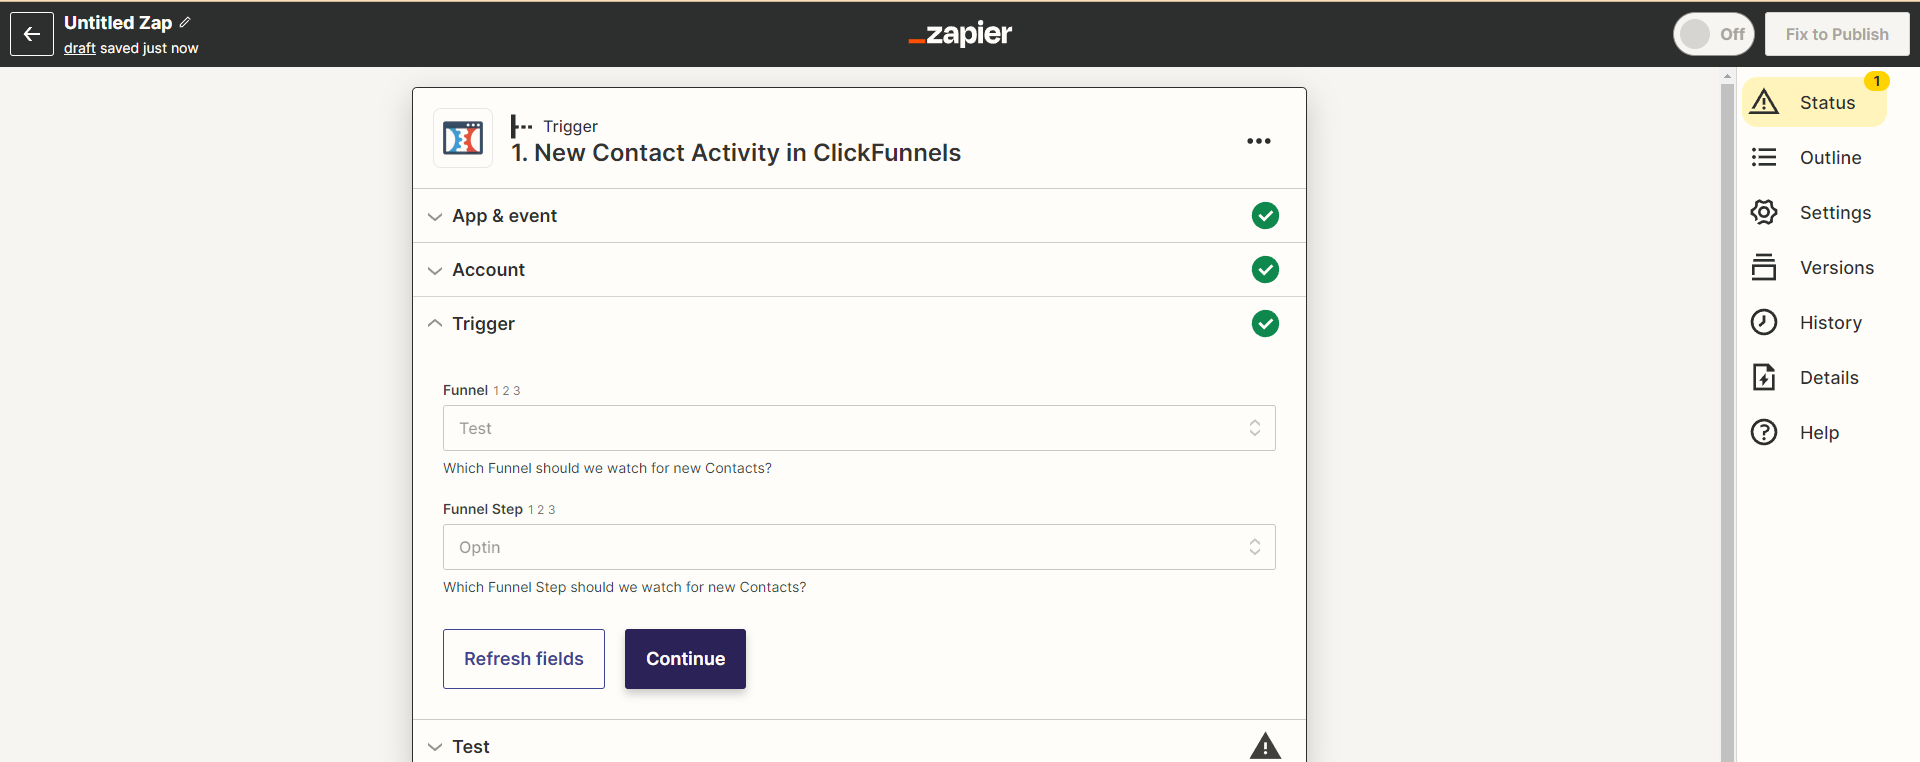
Select the specific funnel from which you want to retrieve data in the funnel options.
Choose the desired step, such as the opt-in page or any other step with the data you want to capture.
Click “Continue” to move on.
Step 3: Test the Trigger
Now, let’s test the trigger to ensure everything is working correctly.
Click on “Test Trigger” to verify the connection.
Open the ClickFunnels page connected to Zapier in preview mode.
Fill in the required fields on the page and press “Enter.”
Go back to Zapier and click on “Test Trigger” again.
Confirm that the fields you filled in on the ClickFunnels page are displayed in Zapier.
Finally, click on “Continue With Selected Records” to proceed with the setup.
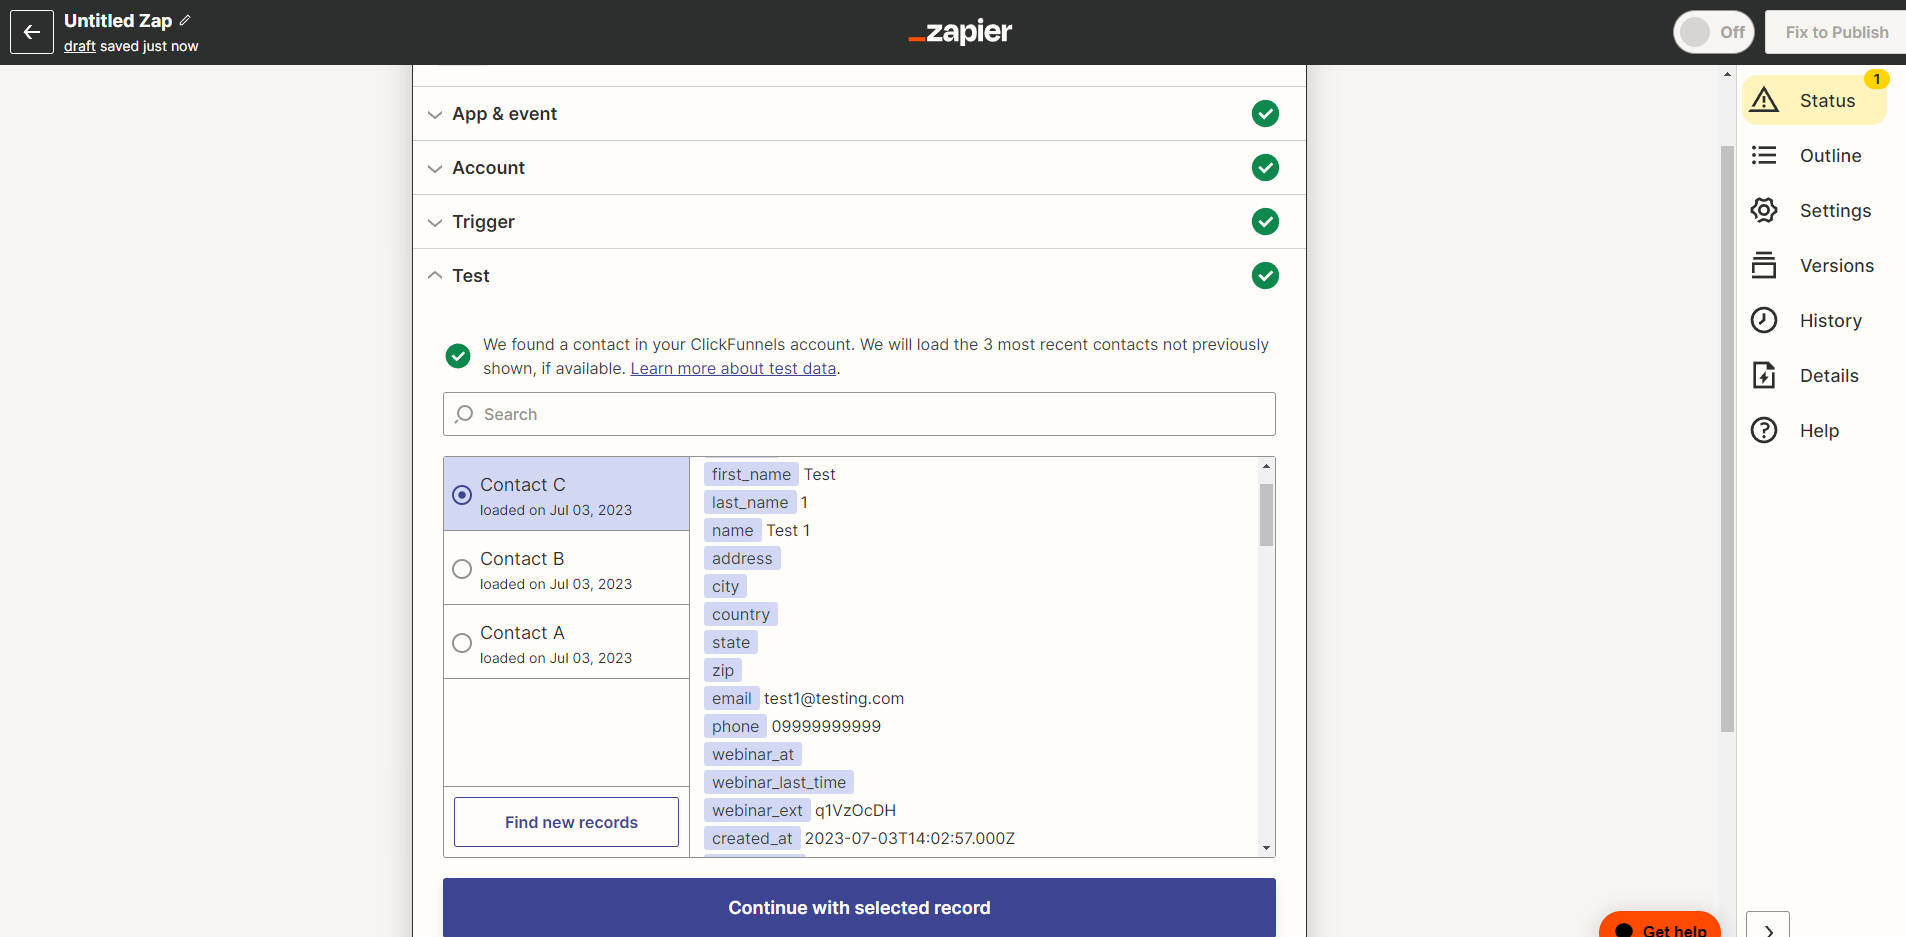
You have successfully set up the trigger in Zapier for ClickFunnels and are now ready to move on to the next steps.
Step 4 : Create a Table in BigQuery
To proceed with configuring the action in Zapier that sends data to BigQuery, follow these steps:
Firstly, log in to your BigQuery account.
Once logged in, create a new table where the captured data will be stored.
In the source options, locate and select “Empty Table” under the “Create Table From” field.
Moving on to the Destination options, carefully choose the project and dataset where you want to create the table.
Now, navigate to the Schema options and click on the plus icon to add a new field to the table.
Begin by entering a descriptive field name for the first data you want to display, such as “Time”.
Next, select the appropriate type for the “Time” field, which would be “Timestamp” in this case.
For the other fields, choose a suitable type, such as “String” for text-based data.
Ensure that all fields are set to “Nullable” for the mode, allowing flexibility in data entry.
If you have additional fields to include, utilize the plus icon to add them one by one.
Finally, click on “Create Table” to finalize the creation of the table in BigQuery.
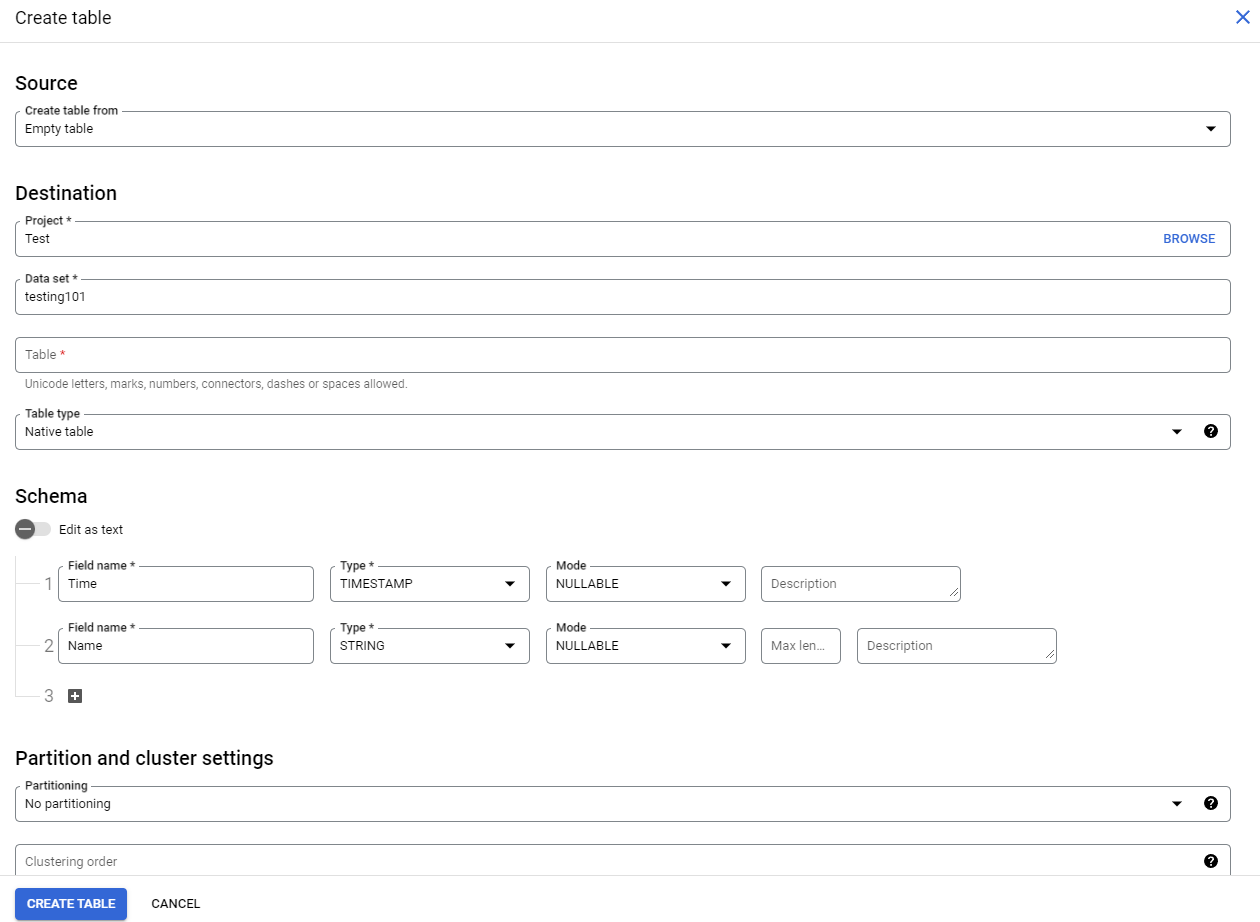
The next step is to proceed with configuring the action in Zapier to send the data to BigQuery.
Step 5 : Configure the Action in Zapier
To configure the action in Zapier that sends data to BigQuery effectively, follow these comprehensive steps:
Open the Zapier tab to access the action configuration settings.
In the action search bar, type “Google BigQuery” to promptly locate and select the “Google BigQuery” action.
Click “Continue” to proceed and advance with the configuration process.
Select “Create Row” as the event type to explicitly indicate your intention to create a new row in BigQuery.
Proceed by clicking “Continue” to move forward with the configuration.
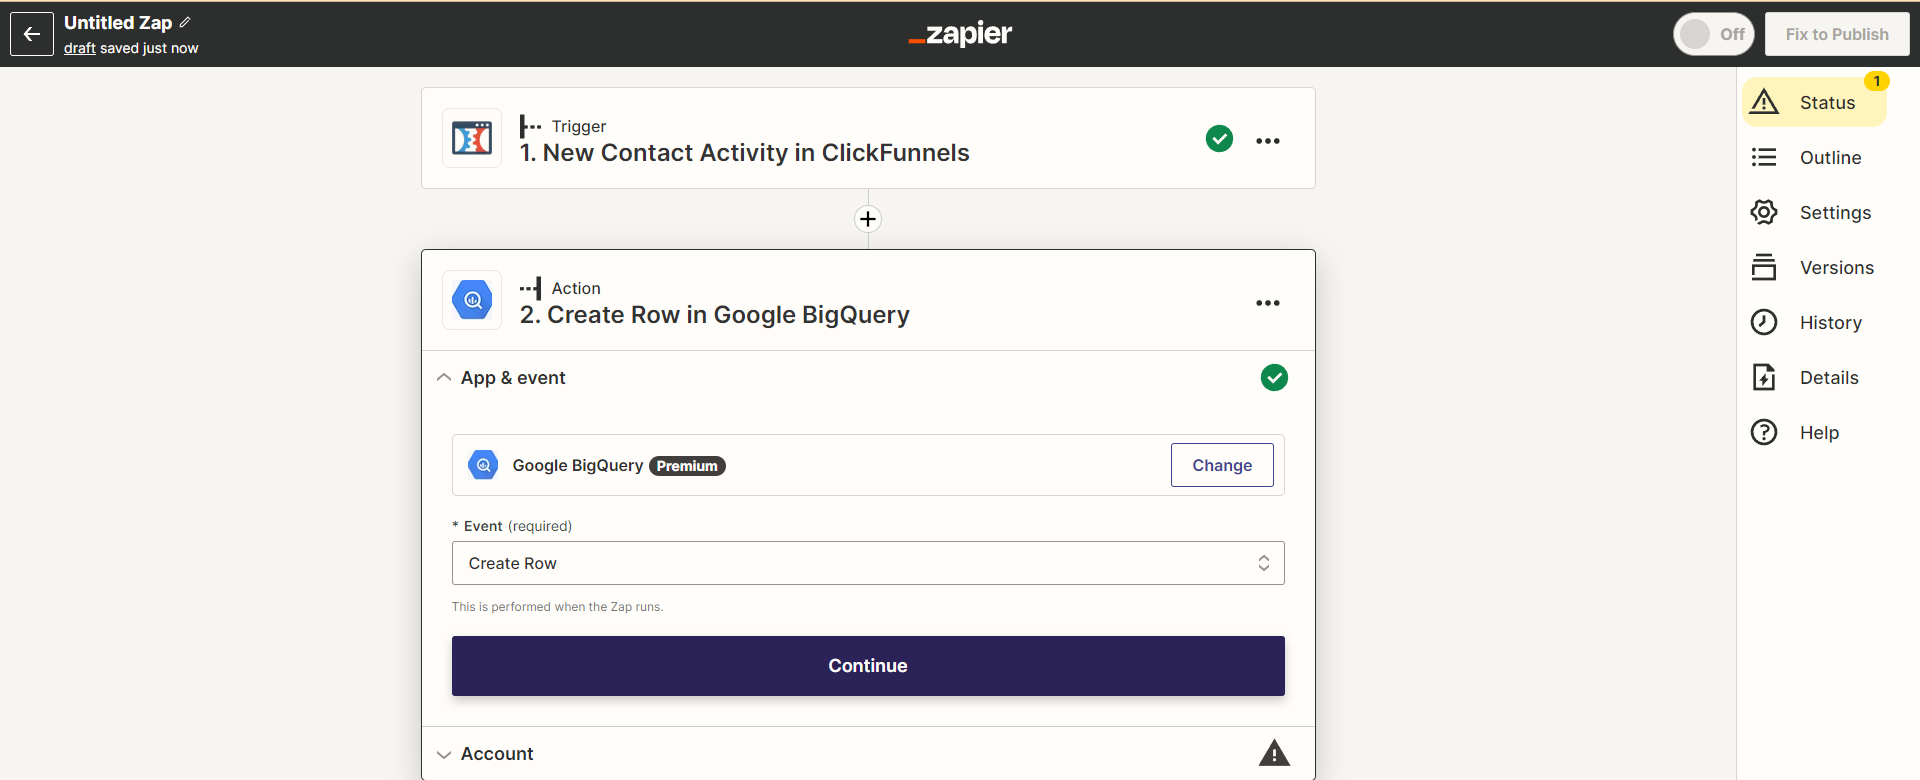
Sign in to your BigQuery account securely when prompted and click “Continue” to proceed.

Now, you will see a range of options for the action configuration.
Choose the relevant project in BigQuery, where you previously created the table, in the “Project” option.
Specify the name of the table and select the appropriate data set.
Populate the fields with the corresponding data from your funnel.
Select and map the appropriate fields that harmonize with the fields in BigQuery. For example, link the “Email” field from your funnel to the corresponding “Email” field in BigQuery.
Once you have meticulously populated the desired fields, click “Continue” to proceed.
Test the setup by filling out the form again on the opt-in or funnel step.
Verify that the data is successfully transmitted to BigQuery.
By carefully following these comprehensive steps, you will effectively configure the action in Zapier to seamlessly send the captured data to BigQuery.
Conclusion:
In conclusion, integrating ClickFunnels with Zapier and BigQuery offers a powerful combination of tools to enhance your marketing efforts and streamline data management, ultimately leading to the creation of a robust data warehouse. As an ad-tracking agency specializing in marketing automation, we are dedicated to helping you optimize your campaigns and achieve greater success by leveraging the capabilities of ClickFunnels, Zapier, and BigQuery.
By harnessing the integration of these tools, we can assist you in automating data transfer, gaining valuable insights, and making data-driven decisions. Our services are designed to improve customer engagement, increase conversions, and drive business growth, all while leveraging the power of a data warehouse.
Take the next step and schedule a call with us today to learn more about how our ad-tracking services can support your business and help you maximize the potential of your marketing automation efforts. Our team of experts is ready to discuss your specific needs and create a customized solution tailored to your goals, centered around the utilization of a data warehouse.